Authentication in ASP.Net Core — Getting Started
A step-by-step guide for implementing user authentication in your ASP.Net Core Web Apps


Authenticating a user is one of the basic and most widely implemented use cases for web applications. In this article, I’ll be taking you through all the code-level details involved in implementing user authentication based on username and password in your ASP .Net Core applications. By the end of this article, we’ll have a full-fledged implementation of user authentication in place.
Before we start, let’s first define what authentication is and what features we’ll need to implement as a part of it.
Authentication in layman’s terms — It is the process of validating that the users are who they claim to be. This is the first step in any security process of an application.
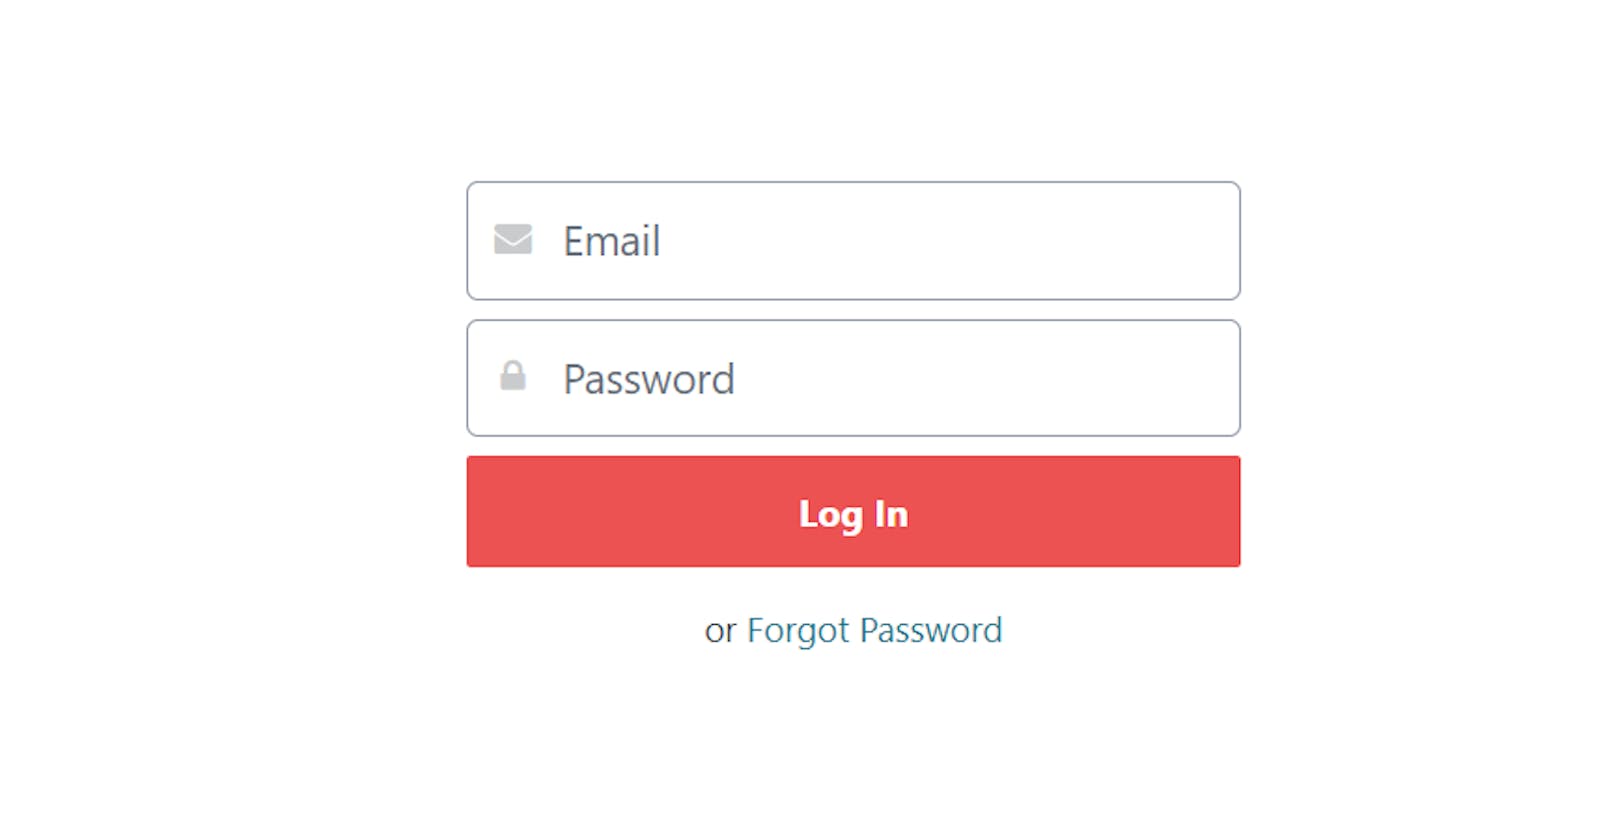
The most common way to authenticate a user is by asking them for their username & password. There are other, more complex ways as well but for this article, we’ll stick to authenticating a user with their username & password. For this purpose, we’ll be implementing the following features — user registration, user login, and user logout.
Since user authentication is usually the first step in any security process, it is extremely important for our applications to protect and manage user data with utmost security. Any compromise in user data would defeat the entire purpose of authentication. This calls for an additional overhead on our side — managing user data securely.
Fortunately, to make our lives easier, Microsoft has provided a framework named ASP .Net Core Identity using which we can avoid the burden of implementing mechanisms for securely managing the users’ data. The Identity framework supports many use-cases for user management such as forgot password, log-in with external login providers, email confirmation, and many more. For our requirement though, we’ll use it for securely storing and fetching users’ data to/from the database.
Note: ASP .Net Core Identity framework helps only with the management of users and it does not provide user authentication. We’ll use it to help us with the management of users data as a part of our overall authentication solution.
ASP .Net Core Identity Framework
Before we dive into the code, let’s first take a look at some theory and architecture of the Identity framework to understand how it’ll be implemented in our app —
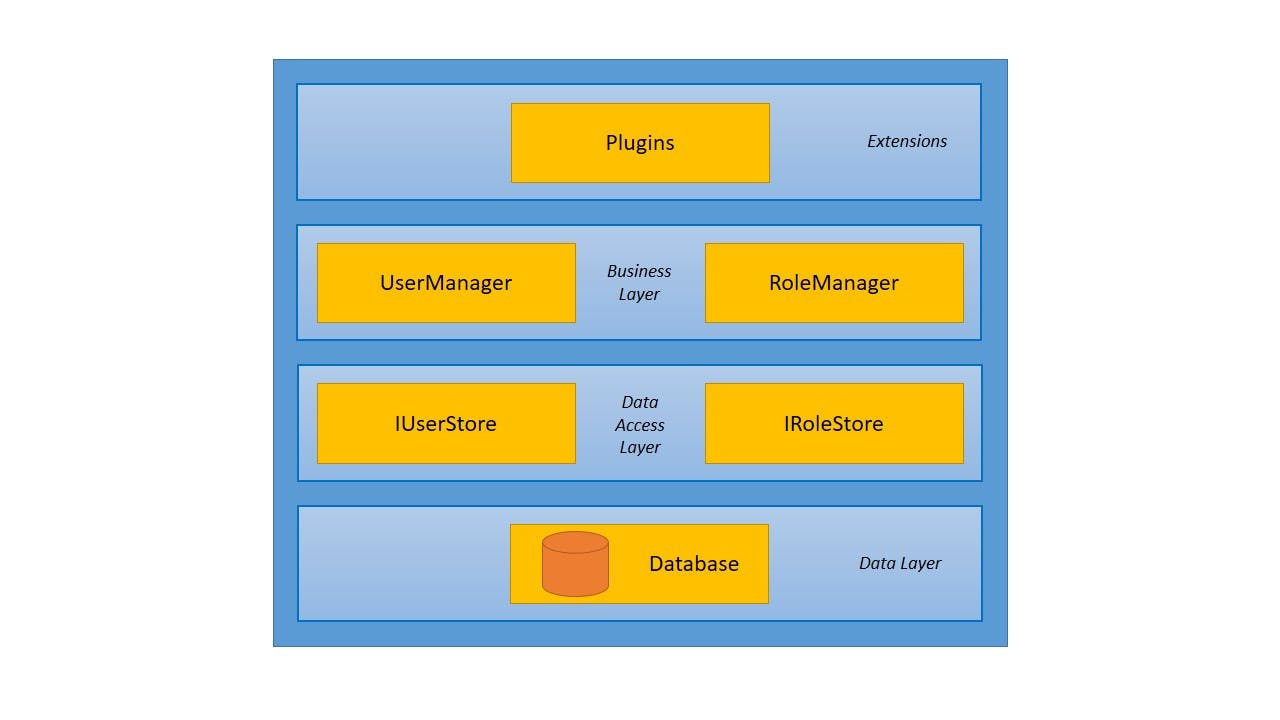
The architecture of the identity framework can be divided into 4 layers —
#1 — Data Layer
The data layer is where users’ data is stored. We have our user database placed in this layer. Also, we are free to have a database of our choice. The identity framework stores user passwords in a hashed format. Meaning, you can only find the password hash of a user in the database and not the actual password. Hashing is different from encryption in that encryption is reversible while hashing is not i.e. encrypted text can be decrypted back to the actual text but a hashed text cannot be converted back to the actual text.
#2 — Data Access Layer
The next layer is the data access layer and as its name suggests, it provides access to the data stored in the database to the layers above it. The identity framework provides interfaces for us to easily implement the data access layer. Some of the important ones are — IUserStore, IUserPasswordStore, and IRoleStore.
IUserStore allows access to the users’ data, IUserPasswordStore allows access to the user passwords, and IRoleStore allows access to the roles data. All these interfaces provide abstract methods for reading/writing the data (get, create, update, etc.) to/from the database. Also, these interfaces abstract the way the schema is implemented in the database. This means we are free to define and use our own custom schema/model for users, passwords, and roles. We’ll see this in action while coding.
Note: IUserStore is a mandatory dependency for the layer above it, hence our solution won’t work until we provide an implementation for the same.
#3 — Business Layer
The business layer is where we implement our business logic such as validating user details, validating user credentials, and loading user details. This layer isn’t concerned with how and where the data is stored, it relies on the data access layer for that. At this layer, the Identity framework provides UserManager and RoleManager implementations that expose APIs for operating on the user data. Both the implementations come with a default configuration that we can easily customize in the Startup.cs. For eg., if we don't want a username to contain digits, we can easily configure this in the Startup.cs. Again, we’ll understand it better when we dive into the code.
#4 — Extensions
At the extensions layer, we extend the functionalities of the managers by integrating them with our custom code or with external libraries/plugins. As stated earlier, the Identity framework is only meant for managing the users and as we saw, the manager classes are responsible for that. For implementing authentication, this means, we’ll need to extend the functionality of the managers in our application by adding our own logic on top of that.
Enough said, time to code ..
The application we would be creating in this article can be found in the below GitHub Repo. Feel free to clone and tweak —
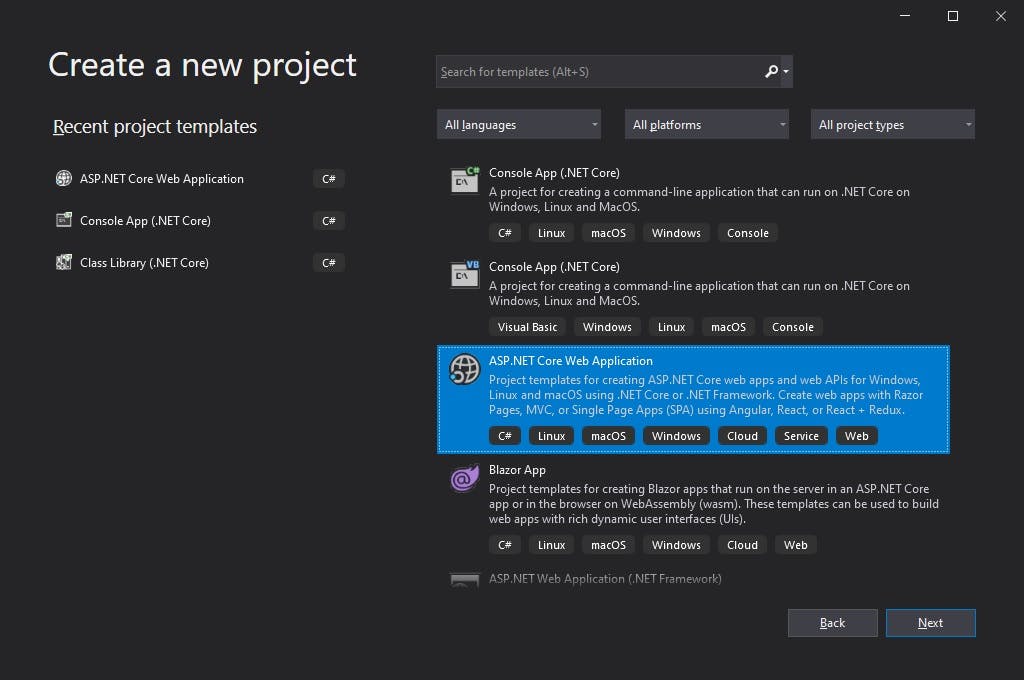
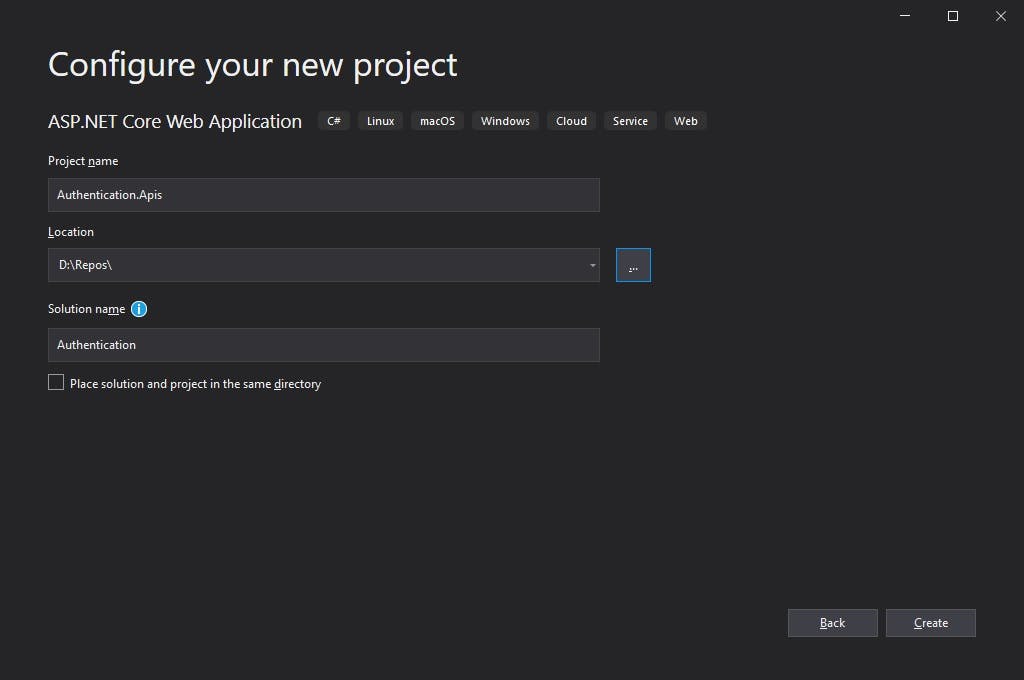
Step #1 — Create a new .Net Core web app project
Step #2 — Add and configure ASP .Net Core Identity in the web app
For adding and configuring the Identity framework in our app, we would have to first define the schema of our user, provide an implementation of IUserStore, and register the Identity framework middleware in our app. Let’s do each of them step-by-step.
- Define a schema/model for storing our users in the database, let’s name it
AppUser.cs
- Before we implement IUserStore, let’s define a repository for dealing with our database (read, write, get users). For keeping things simple and to focus on the authentication part, we’ll store users' data in memory instead of a database.
- We are now good to provide our implementation for the IUserStore. To manage user password hashes, we’ll also need to provide an implementation for the IUserPasswordStore.
- Now that we have everything defined, it’s time to register and configure the identity framework middleware into our web app and yes, you guessed it right — we’ll have to do it in our
Startup.cs
In the above snippet, just for the demo, we configured the identity framework to allow only certain characters in the username. Other properties like email and password can be configured in a similar way.
Now that we have the identity framework configured in our web app, it’s time to implement our authentication features — registration, login, and logout.
Step #3 —User registration
To accept user details for registration, we’ll be implementing an API that takes registration details as input.
- Let’s start by defining the input model,
RegistrationInputModel.cs
To keep things simple, we’ll just accept the user’s name, email, and password as a part of our registration.
- Next, let’s implement the register API in
AccountsController.cs
Noticed _userManager in the above snippet? That’s because now we are implementing our business layer. When we configured and registered the Identity middleware in our app, the implementation of UserManager with our defined configurations also got registered. The only thing UserManager requires from our side is the IUserStore implementation and we already did that in the previous step.
Now that we have everything in place for the user registration, let’s quickly run our app and try it out in postman.
POST request to /accounts/register
{
    "userName": "john",
    "email": "john@email.com",
    "password": "&Secret99",
    "confirmPassword": "&Secret99"
}
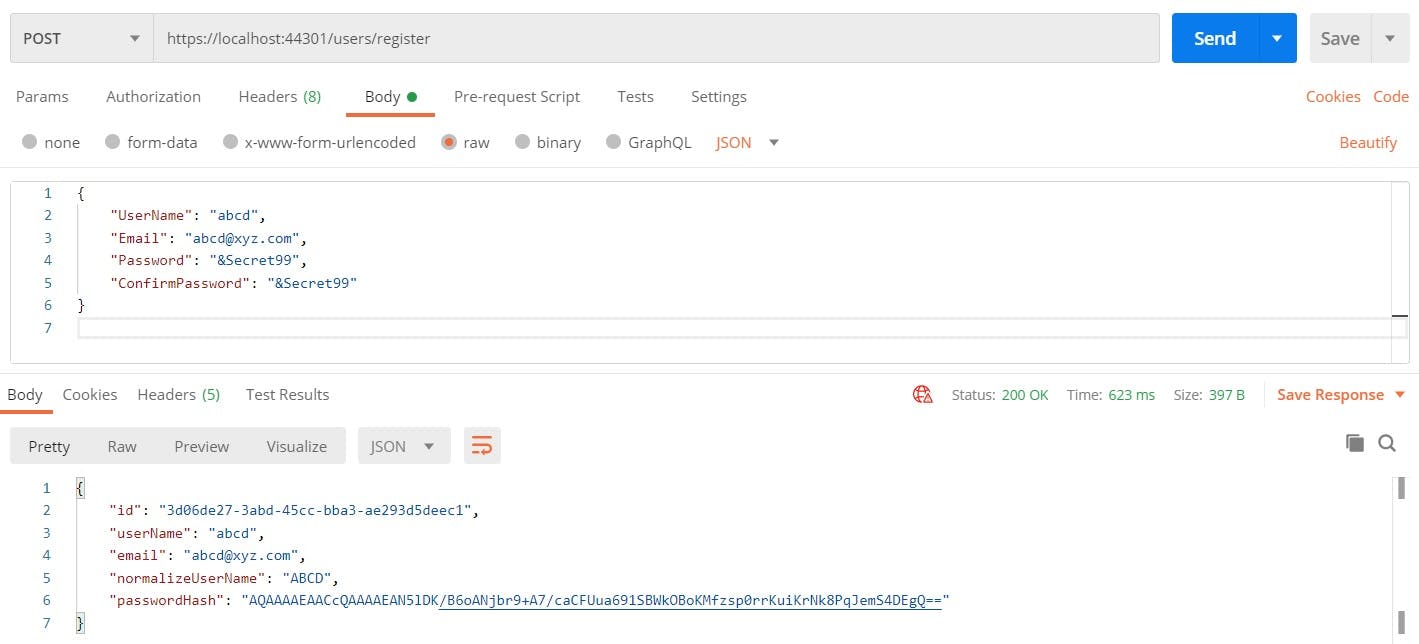
There we have our first user successfully registered in the app 🥳
Let’s also check what happens when we provide any character other than the allowed ones we configured in our app for the username.
POST request to /accounts/register
{
    "userName": "johndoe",
    "email": "johndoe@email.com",
    "password": "&Secret99",
    "confirmPassword": "&Secret99"
}
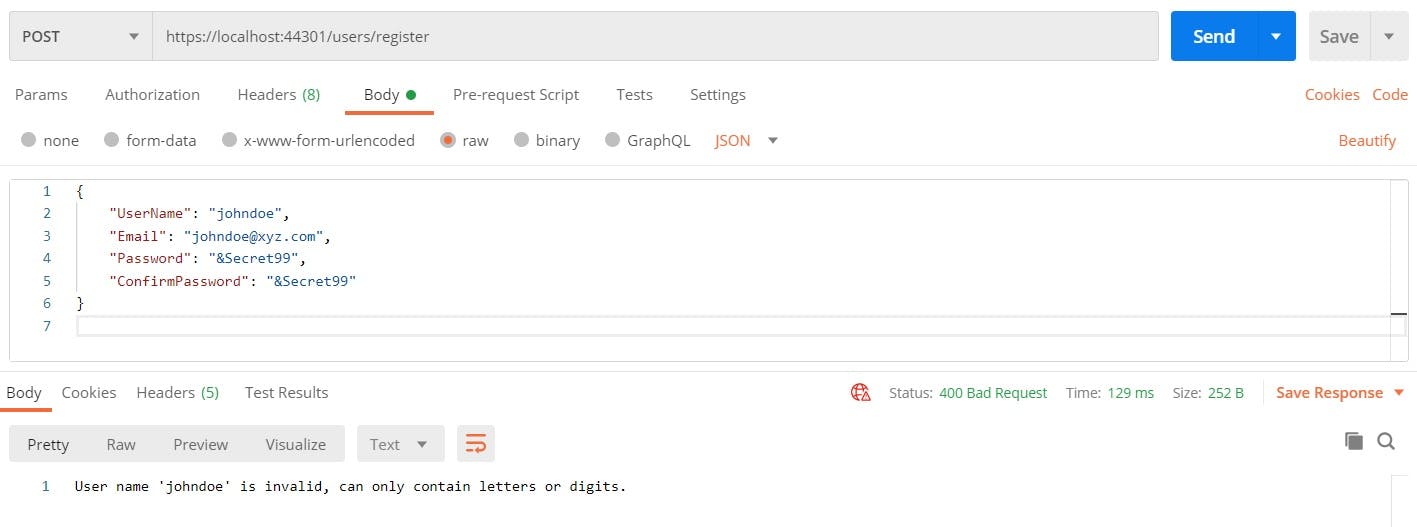
As seen above, the identity server takes care of ensuring that our configurations are imposed without any additional work from our side. Next, it’s time to login with the user credentials we just registered.
Step #4 — User login
Before we dive into the login code, there are a few authentication concepts specific to the ASP .Net Core that we must understand.
In ASP .NET Core, authentication is handled by the
IAuthenticationService. This service uses registered authentication handlers to complete authentication-related actions — authenticating a user, and responding when an unauthenticated user tries to access a restricted resource.
An authentication handler is nothing but an implementation of the authentication behavior. It is where validation checks are implemented based on which authentication success or failure is returned. We can use the default authentication handlers, or we can implement our own by extending the abstract class AuthenticationHandler<TOptions>. Authentication handlers require configuration options for allowing us to configure the handlers at the time of registration in Startup.cs. Also, it is possible to register multiple authentication handlers in a single web app which means we can have multiple ways of authenticating a user in the app.
Now, how to identify which authentication handler to use for authenticating the users for a specific resource? That’s where ASP .Net Core provides a provision for naming the authentication implementations which are formally called “authentication schemes”.
Below syntax for registering a custom authentication scheme will clarify the concepts better —
services.AddAuthentication().AddScheme<TOptions, THandler>(string authenticationScheme);
By providing a string value for the authentication scheme parameter, applying the scheme becomes as easy as providing that value in the authorize attribute —
[HttpGet]
[Authorize(AuthenticationSchemes = "myAuth"]
public IActionResult Get()
{
    // users are authenticated with "myAuth" scheme ..
    // .. registered in the app
}
With the above concepts clarified, we can now proceed to the code.
- To use the authentication service, we’ll have to register it in our app in the Startup.cs.
In the above snippet, we registered the authentication service in our app with a cookie-based authentication scheme; ASP .Net Core provides a method AddCookie() for the same. Also, we named the cookie-based authentication scheme “Cookies” and set it as the default scheme, in case no scheme is specified at the time of authentication.
Now, you might be wondering “why cookie-based authentication scheme?”
That’s because we would like to persist the user session so that once a user logs in, he should be able to access his protected resources without providing his credentials until he logs out. Typical authentication scenario.
- Once registered, we’ll also have to add the authentication middleware to our app’s pipeline.
Now, similar to the user registration, we’ll be implementing an API for user login that takes user credentials as input.
- Let’s start by defining the input model for our login API,
LoginInputModel.cs
- Add the below Login API implementation in the
AccountsController.cs
The above code seems clean and compact but if you’re wondering about ClaimsIdentity, ClaimsPrincipal, Claims, and the mysterious SignInAsync(), keep reading ..
In ASP .Net Core, an instance of ClaimsPrincipal represents a user in the application, and a user can have multiple identities.
To make a better sense of this, let’s relate this in the real world — you are issued multiple identity cards (driving license, passport, etc.). Each of these cards has your details listed in key-value pairs (name, dob, address, etc.). And lastly, each identity card enables you some kind of access, for instance, a driving license grants you permission to drive on the road.
Coming back to ASP .Net Core, you (user) are represented by an instance of ClaimsPrincipal, your identity cards are represented by instances of ClaimsIdentity, and each key-value detail on your identity card is represented by an instance of Claim. This way, in our app, we can decide whether a user is who he/she claims to be based on the claims he/she provides on the identity and this is what we call “claims-based authentication” in ASP .Net Core. Claims-based authentication is also the recommended authentication approach in ASP .Net Core apps.
Coming to the HttpContext.SignInAsync(), let’s first understand HttpContext in a nutshell. In ASP .Net Core web app, a new instance of HttpContext gets created for each HTTP request and once the request is completed, the instance is destroyed. HttpContext holds a number of properties that, as a whole, indicate the context of the current HTTP request (Request, Response, User, Session, etc.).
The SignInAsync() creates an encrypted cookie and adds it to the current response. The client then stores this cookie for authenticating further requests.
Let’s now quickly run our app and try user login in Postman ..
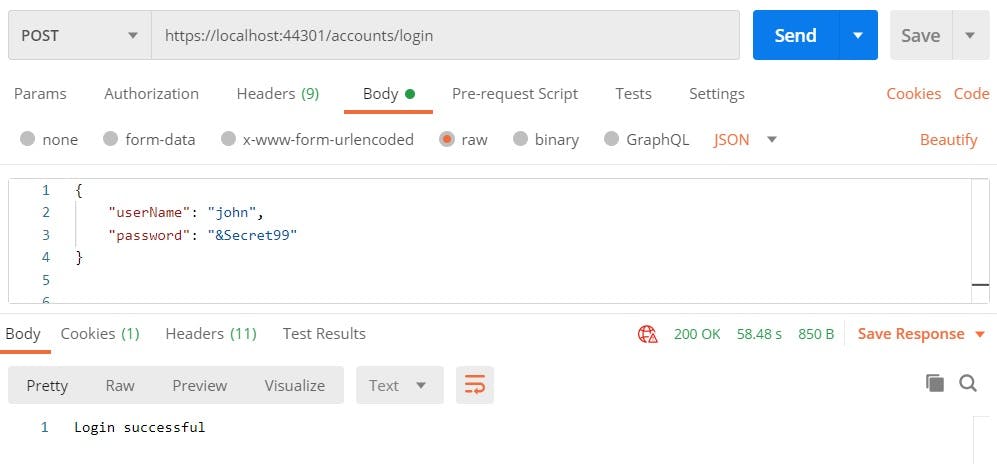
There we have the first user successfully logged into our application 🥳
Let’s also check in Postman whether we received a cookie to persist the session for the logged-in user.
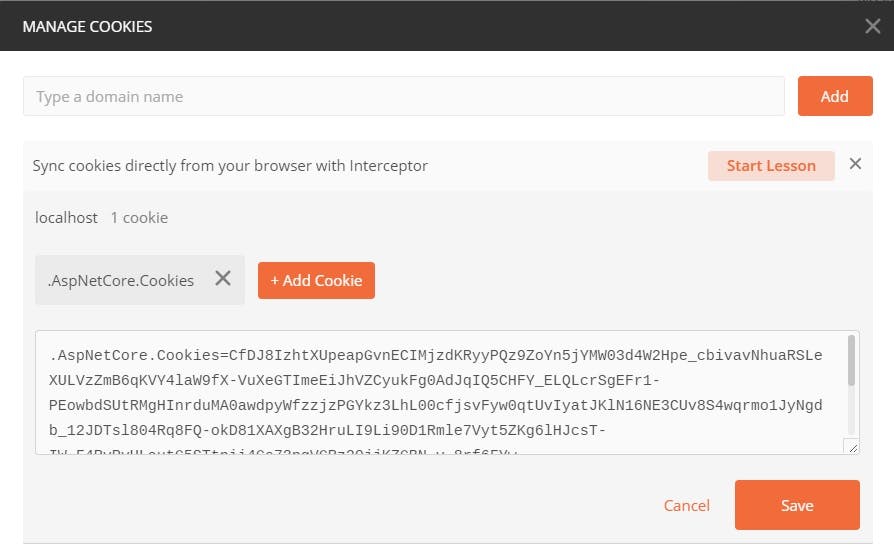
As we can see, we successfully received the cookie that would be used in further requests to our app for authentication.
What if we provide the wrong credentials to the login API?
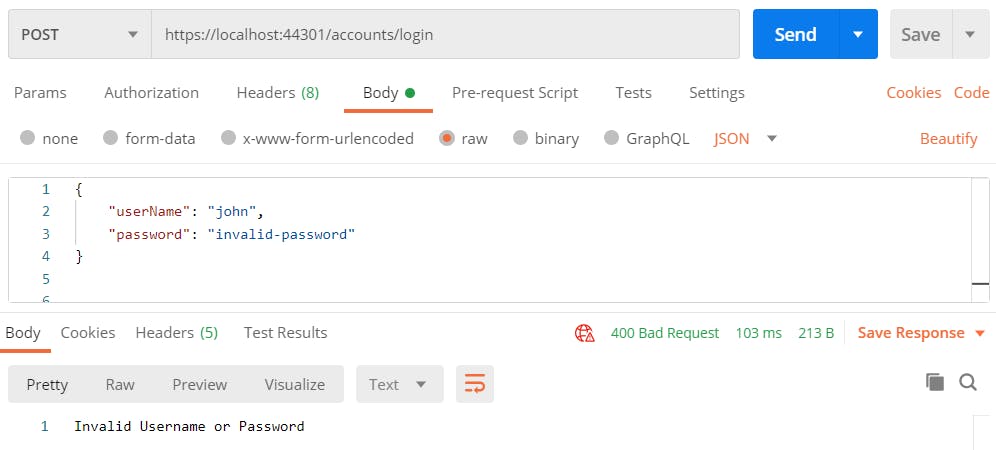
This ensures successful implementation of user login in our app. Let’s now take a look at the user logout.
Step #5 — User logout
With registration and login features in place, user logout becomes the easiest and most straightforward feature to implement. Here, we just have to expose an API for signing out the user without any input from the user.
- Add the below logout API implementation in
AccountsController.csfile.
SignOutAsync() on HttpContext signs out the user with a specified authentication scheme, “Cookies” in our case. This also takes care of deleting the cookie stored in the browser at the client-side (Postman in our case).
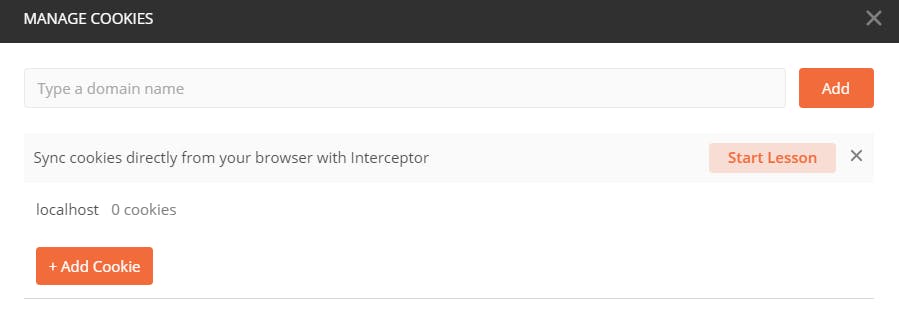
Let’s try it out in Postman.

This should delete the cookie stored in Postman.
This completes all our authentication features 🎉
Next, let’s create a protected API and check if our authentication features are working as expected.
Demo
For the demo, let’s implement a details API that would return the details of the logged-in user.
- Add the below details API implementation in the
AccountsController.csfile.
Also, we’ll have to register the authorization middleware in our app for the authorize attribute to work. With the authorize attribute, we mark this API as protected i.e. it can only be accessed by an authenticated user. Also, note that we didn’t define any authentication scheme in the authorize attribute. In this case, it’ll use the default scheme we defined at the time of configuration.
- Add below line in
Configure()inStartup.csto register the authorization middleware in the app.
app.UseAuthorization();
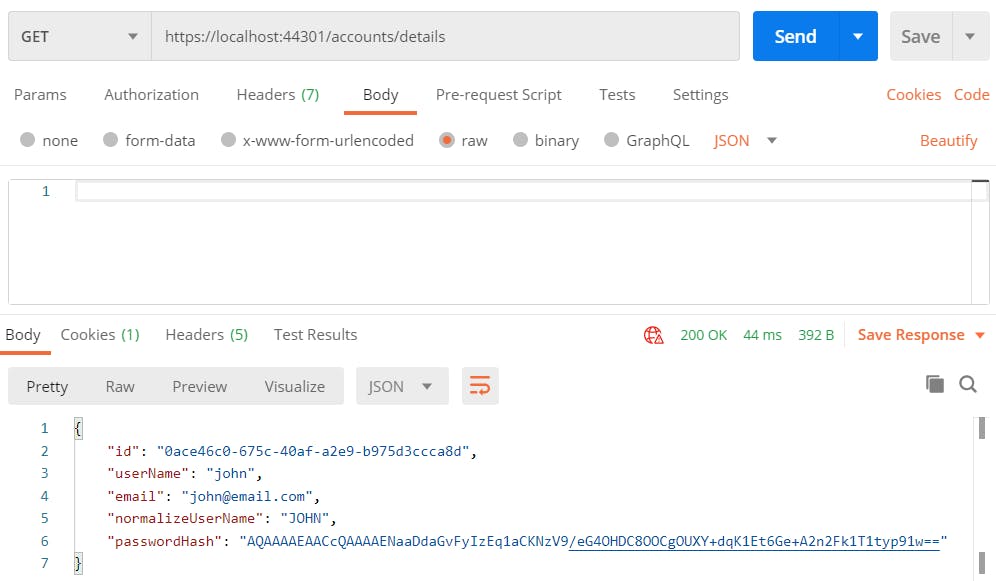
Let’s run our app, register a user, login with that user, and hit the details API.
Now, let’s hit the details API without user login.
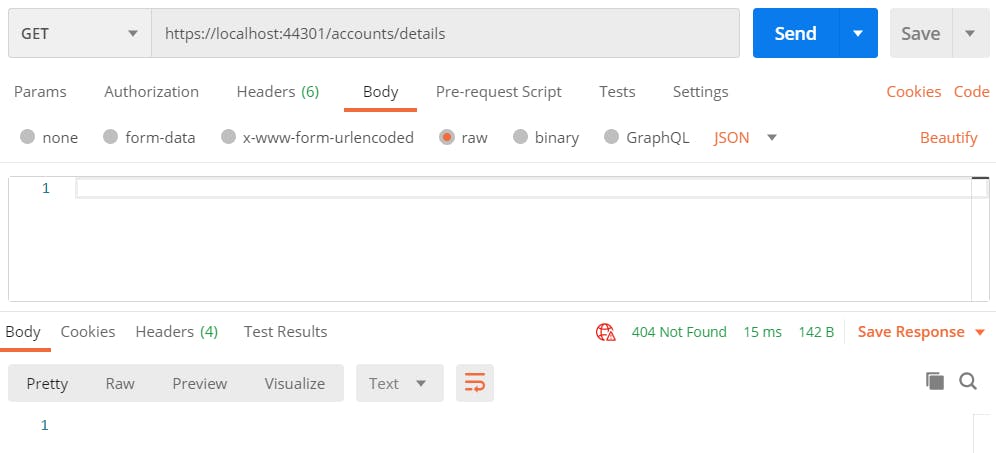
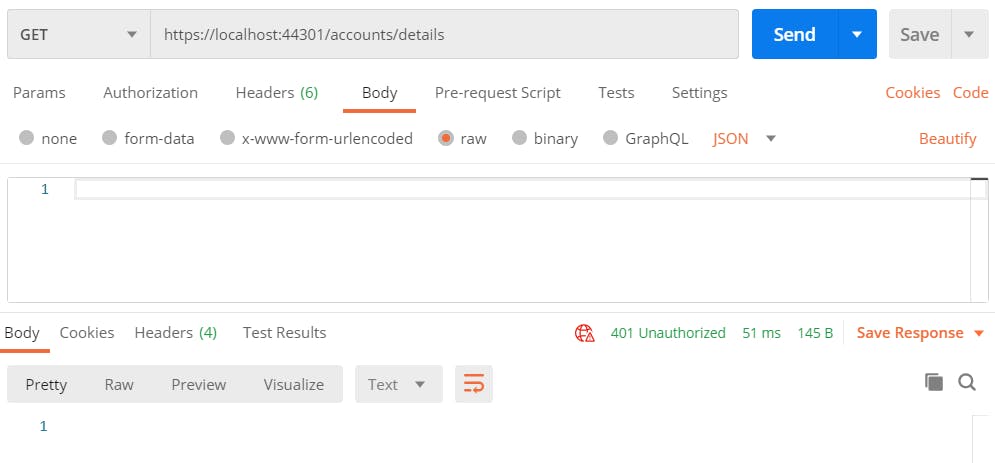
As expected, we get the error response. However, we should ideally get 401 (Unauthorized) but we got 404 (Not Found). This is because the default configuration of cookies authentication scheme redirects to a login page which we haven’t defined yet. We can change this behavior to return 401 by replacing services.AddAuthentication() in ConfigureServices() of Startup.cs with the below code.
Add the below implementation for the ReplaceRedirector() in Startup.cs.
Now if we hit the details API without user login, we would get 401 Unauthorized response.
With this, we have implemented user authentication in our ASP .Net Core Web App that authenticates users based on their username and password. However, with the advancements in security protocols, we now have several approaches available for authenticating users in our applications. This means we’ve only scratched the surface with this article.
I hope you found this article helpful and easy to follow. If you have any queries and/or suggestions, feel free to share them in the comments section below.
Bye! 🍻